
Creating a Call-For-Fire mission
Click ‘Fires Line’ button

∆ Image 4b.3: Strike Schedule Worksheet panel for fires Line |
Click on the new entry and select the asset/calibre and the firing units
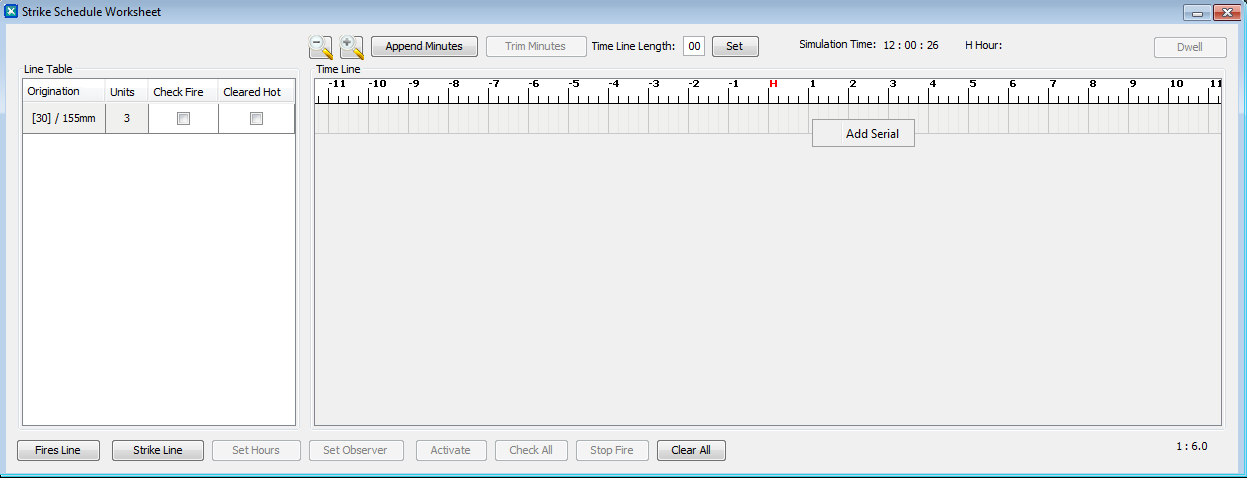
∆ Image 4b.4: Strike Schedule Worksheet (Add Fire Serial) |
Right click on the time line of the selected entry, and click ‘Add Serial’
Enter the mission data into the ‘New Fire Serial’ window and click ‘Add’ button
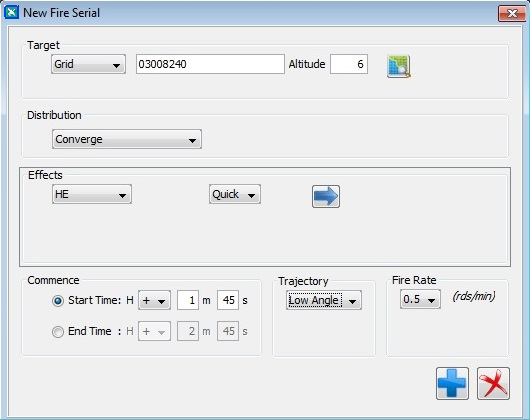
∆ Image 4b.5: New Fire Serial window |
NOTE:
In order to add a new serial, user may right click on any point of the timeline. But the start time is automatically rounded to the nearest 15 second. The end time of the serial is shown as +1 minute from the start time.
NOTE:
Keeping the serial in its default end time parameter will create only 1 round of fire which is equal to a fire serial which spans for one minute with the rate of fire as 1.
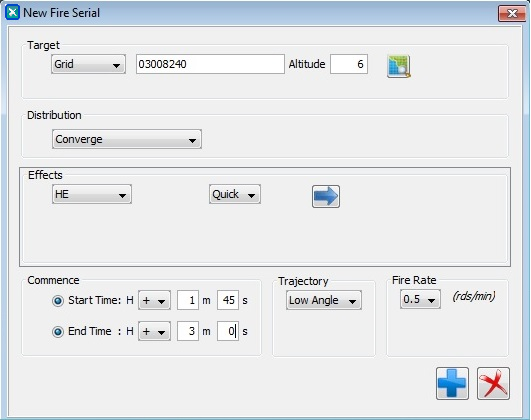
∆ Image 4b.6: Editing end time in New Fire Serial window |
NOTE:
The start time and end time are editable upon user preference.
Once you click “Add” button, the new serial will created in the serial table
∆ Image 4b.7: Strike schedule Worksheet (Fire Serial) |
To edit the serial, click ‘Edit Serial’ after the serial is added. The created fire serials can be copied and pasted in the same line or in another line. The user can paste the copied serials for multiple times. For an example: copy serial from the top line to the second line when the user needs to do the same request to the second asset as well. The pasted fire serials can be edited. To delete the serial, click ‘Delete Serial’ after the serial added.
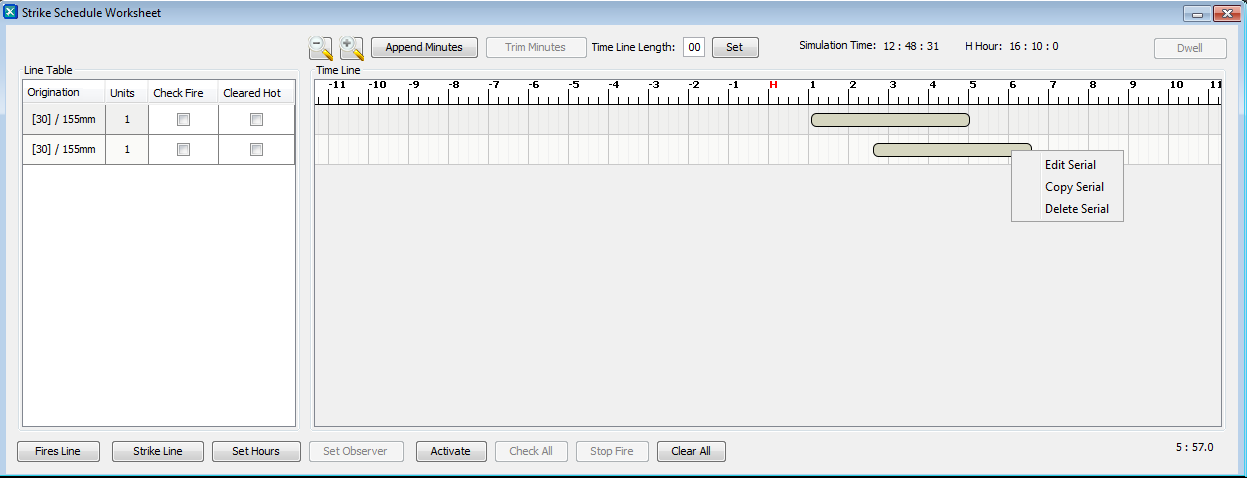
∆ Image 4b.8: Strike schedule Worksheet (Fire Serial) |
Now you need to set the hours when it should start firing the rounds. Click on “Set Hours” button and set the “H Hour”. You can see in the right top corner of the ‘Set Hours’ window.
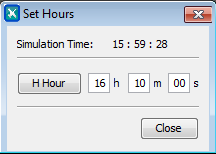
∆ Image 4b.9: Set Hours window |
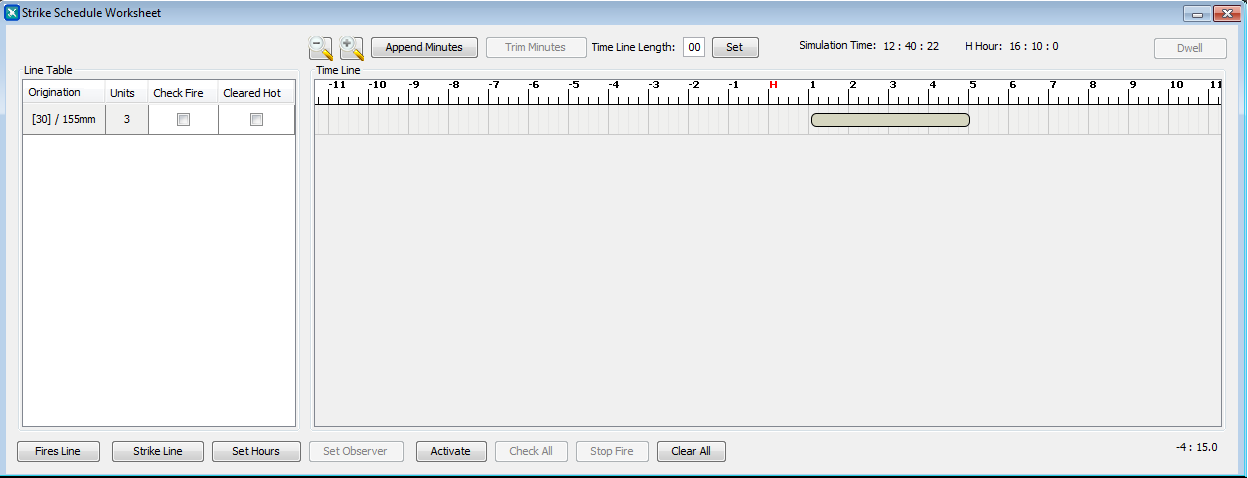
Now click ‘Activate’ button to create the fire mission. Then the ‘Check All’ and ‘Stop Fire’ buttons will become active.
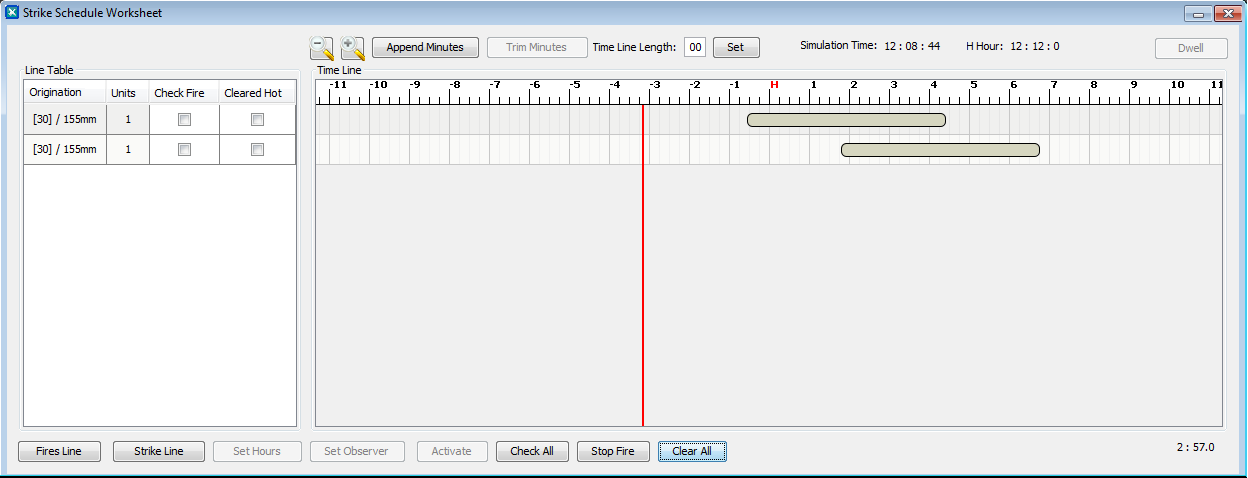
∆ Image 4b.10: Strike schedule Worksheet (Fire Serial) |
To edit the serial, click ‘Edit Serial’ after the serial is added. To delete the serial, click ‘Delete Serial’ after the serial added.
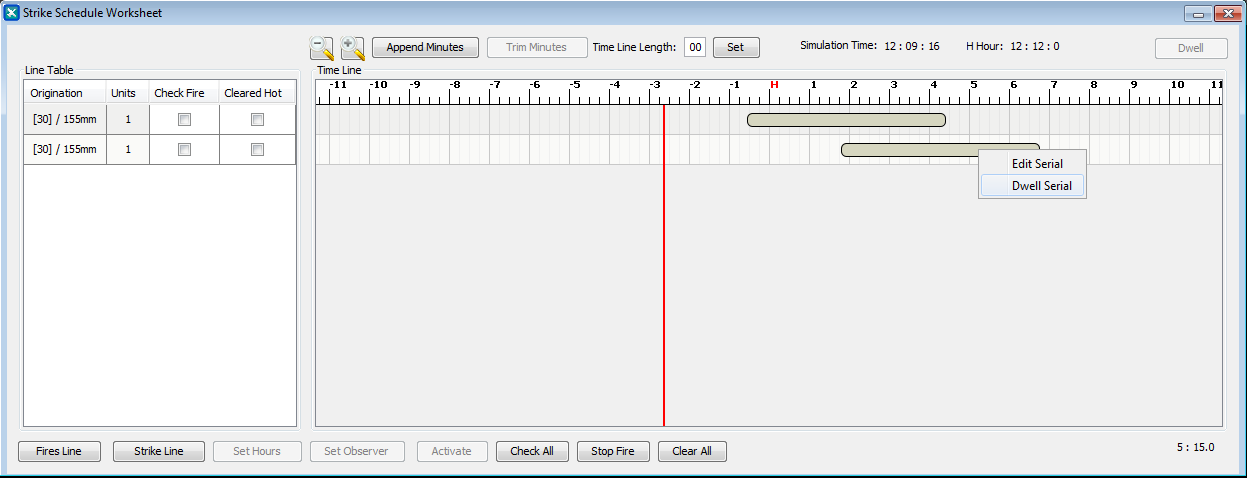
∆ Image 4b.11: Strike schedule Worksheet (Fire Serial) |
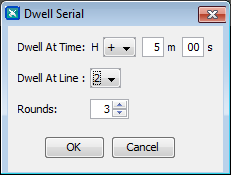
∆ Image 4b.12: Dwell Serial window |
Selects the details from within the Dwell Serial window and then click ‘OK’.
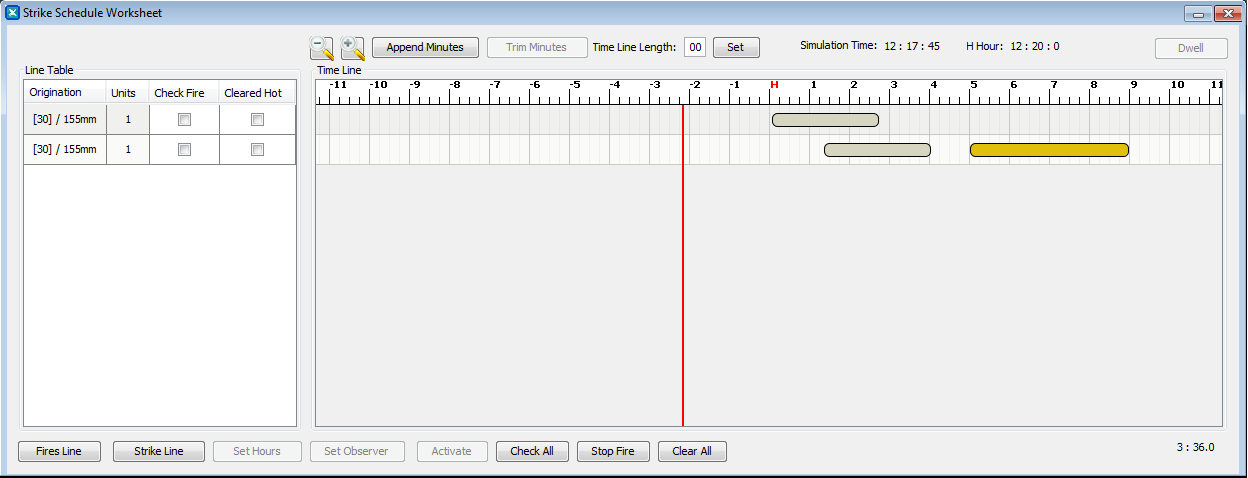
∆ Image 4b.13: Strike schedule Worksheet (Fire Serial) |
The highlighted serial added in the worksheet is the dwell serial created.
When the mouse pointer is hovered upon a serial it will pop up a short description about it. In Grid missions the target location will be shown
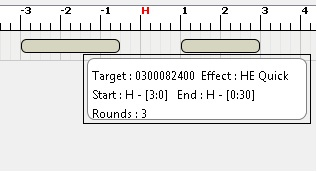
∆ Image 4b.14: Fire Schedule Worksheet- Grid Description |
- After activating the schedule worksheet, the starting point of serials cannot be changed but the end point of serials can be changed.
- Activated serials have a minimum time length that it can be set.
- With a line consisting of many serials that are followed by another on the same line, serials that have completed firing would not be allowed to change the end time.