Basic Functions
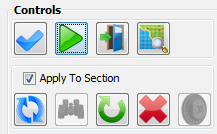
The basic functions of the Instructor Control Panel are described in this section. Those are check mission data, view mission geometry and create new or abort tasks.
Check Mission Data
Before a mission is added to the task list, properties such as heading, distance, and target elevation can be compared to actual values. Once the “Validate” button is clicked, the actual values appear red.

∆ Image 23d.16: Check Mission Data |
Mission Geometry
Geometry is displayed in two ways.
- When the “Validate” button is clicked, basic mission geometry is displayed.
- Start Location: None, grid 5600 6600, Attack Details: grid 5960 6350, weapon 500lb bomb, and Egress: KEYHOLE, D 3
- After a mission is added to the task list, (Click “Execute”), Select the task and aircraft to view the exact flight path.
- Start Location: KEYHOLE, D 2, Ref Grid 5960 6350, Attack Details: Same as Ref Point, weapon 500lb bomb, and Egress: KEYHOLE, D 3
∆ Image 23d.17: Basic Geometry with “Validate” |

∆ Image 23d.18: Mission Table |
∆ Image 23d.19: Flight path for selected Mission, Task, and Aircraft |
Re-Attack
Instructors can re-attack any task. The same Start Location, Attack Details, Egress and Remarks will be used.
- Select an active mission, then select any task (any color).
- Click “Execute” or “Re-Attack”. New task will be added to that mission.

∆ Image 23d.20: Re-Attack Task with Same Mission Data |

∆ Image 23d.21: Commands |
Abort or End Missions
To abort a mission, select an active mission and a task. Click “Abort” button to end the selected Task. Aircraft will return to the last holding area.
To End a Mission, Select an active mission. Click “End Mission” button. This will end all tasks for this asset. The Instructor must click “Create Mission” to assign new tasks for this asset.
